


Getting Start with LensFlare Studio
LensFlare Studio is a powerful light manipulation tool for creating great optical effects. Lens flares can enhance any image - from portraits, action shots, artistic imagery to design elements like logos and titles. They work especially well on dark images, increasing contrast and depth.
LensFlare Choices
LensFlare Studio includes a wide variety of LensFlares to choose from. They cover everything from epic “Hollywood” anamorphic flares, natural sun light, to subtle glints of light. Add a big anamorphic flare to any picture to give it a high tech cinematic look. Add a small glint of light to emphasize a reflection in a photo.
Here are the main screen components:
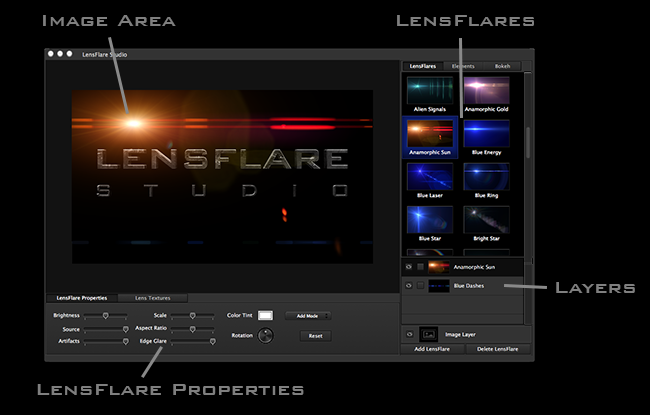
LensFlare Studio starts up with a single flare effect to play with. Using your mouse, simply click and drag anywhere on the image to position the flare. You are effectively setting the light source of the flare, and the other elements and artifacts automatically position around the source creating various streaks and reflections.
Loading your first photo
It's easy to open your own photo as follows:
- File->Open (Command-O) to open photo.
- Drag photo to Image Area.
- Paste photo from Clipboard.
LensFlare Layers
LensFlare Choices
On the right side of the screen are the LensFlare choices. They are broken out into categories.
To add a LensFlare, simply double-click a LensFlare icon, click Add LensFlare, or press Command-A.
LensFlare Layers
Each LensFlare is treated as a layer on your photo. You can add multiple LensFlares to your photo.
At the bottom right is the list of LensFlare layers. Here you will find the current LensFlares on your image.
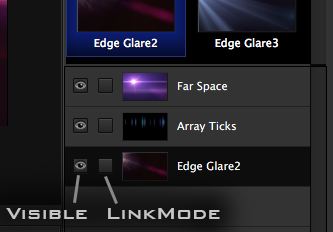
Layers can be set as follows:
Visible - set visibility of layer.
Link Mode - enable link mode for layer. When positioning a layer with link mode, all other layers with link mode checked will move too. This allows you to link several layers of elements and move them together.
To Duplicate a LensFlare, select layer, then select Command-D, or right-click on flare layer to select Duplicate.
To Delete a LensFlare, select layer, then click Delete button, or right-click and select Delete
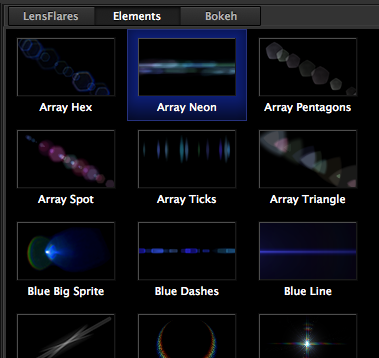
Elements
LensFlare Studio includes a selection of Elements. These are individual components of typical LensFlares, such as iris arrays, streaks, and light sources. These allow you to augment any of the LensFlare presets with additional features. For example, you can add streaks to LensFlares for more of an anamorphic look. You can also start from scratch and build up your own custom LensFlare with elements. Be sure to enable LinkMode for each Element layer so they move in sync.
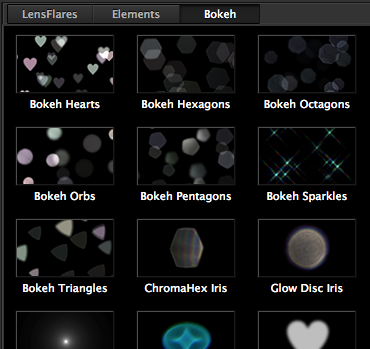
Bokeh
LensFlare Studio includes a selection of Bokeh presets. Bokeh refers to the aesthetic quality of the blur in out-of-focus areas of an image. Bokeh has been defined as "the way the lens renders out-of-focus points of light". Bokeh occurs for parts of the scene that lie outside the depth of field. The Bokeh presets in LensFlare Studio provide various shapes of out of focus iris elements.
For the Bokeh presets, the position of each iris element is random. So each time you select it, it will be unique. You can reselect a Bokeh preset to try another randomized pattern. Simply double-click the Bokeh icon to reselect it and see another pattern.
LensFlare Properties
LensFlares can be customized with the following properties.

Brightness and Gamma
These changes overall intensity of light.
Saturation
This sets the saturation color intensity of the selected effect.
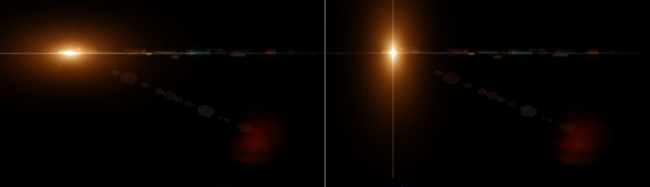
Source
This adjusts just the brightness of the light source, while not effecting other elements. The light source is the main part of the LensFlare that is at the selected position. This is useful when adding a LensFlare to an existing light source in your photo. Lowering this will leave all of the streaks and artifacts without overpowering your photo's light source. Add interesting streaks and artifacts to an existing shot of the bright sun.
Artifacts
This adjusts the brightness of everything except the light source. Use this to isolate the main part of a LensFlare without other elements and reflections.

Using the Source control and with the Artifact control, you can combine the Source of any LensFlare with the artifacts of any other LensFlare. The possibilities are almost limitless for creating your own LensFlare designs.
Edge Glare
This adjusts the intensity of edge glare. Edge glare only shows up when the light source is near the edge of your photo. When a light is near the edge of a real camera lens, these additional streaks and blooms can show up as light shines across the surface of the lens. This control allows you to lower these if not wanted.
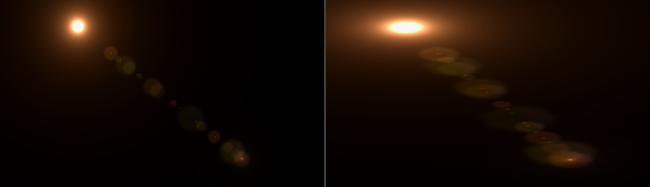
Scale
This adjusts the overall scale of the LensFlare, changing the size of all elements. This is a great way to dramatically boost the apparent intensity instead of just increasing Brightness. Lower the Scale to create subtle glints and reflections.

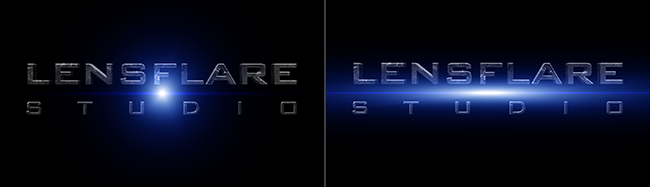
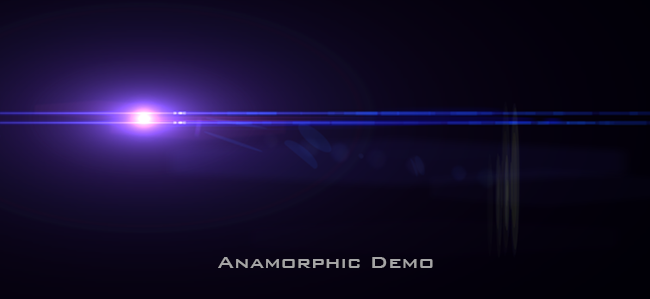
Aspect Ratio
This will adjust the aspect ratio, changing just the horizontal scale. With this, you can turn any LensFlare into an anamorphic LensFlare with its characteristic stretched elements.
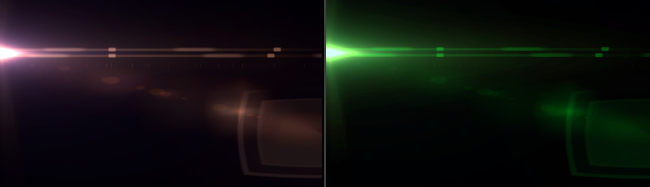
Here's another example. Turn the Aspect Ratio slider all the way to the right to turn just about any flare into a glowing streak of light. You can reduce the Scale slider a bit to make the glowing line thinner.
Color Tint
This sets the overall color tint of a LensFlare. The color can be adjusted a little to shift a flare to match your image, or used more dramatically to completely change the look.
Rotation
This adjusts the rotation of the source elements. This is useful to rotate a prominent streak at the source, while not affecting other non-source elements. Try vertical instead of horizontal for a unique look.
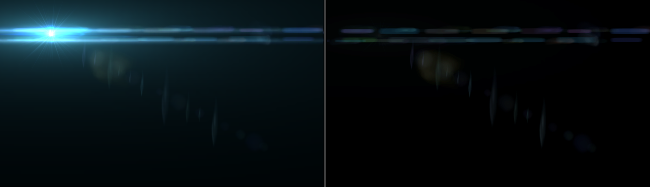
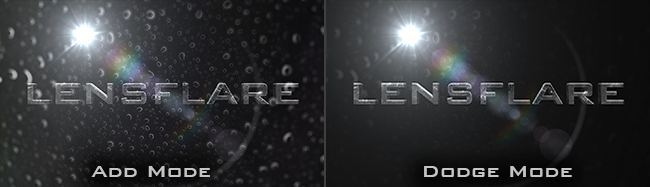
Blend Mode (Add/Dodge)
This sets blend mode of the LensFlare elements. Add Mode is generally brighter and more natural looking, which adds the elements on top of your image. Dodge Mode is less bright but intensifies colors where it overlaps. This can be used for some cool atypical results. Add Mode is the same as "Linear Dodge (Add)" in Photoshop while Dodge mode is modeled on "Color Dodge" blend mode.
Blur
This controls horizontal blur used to soften flare elements.
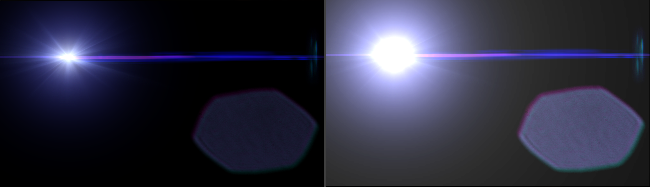
RGB Split
This controls the chromatic aberration effect, where the curvature of the lens causes light to split into RGB components.
Reset
Pressing this will set all of the LensFlare properties to their initial values.
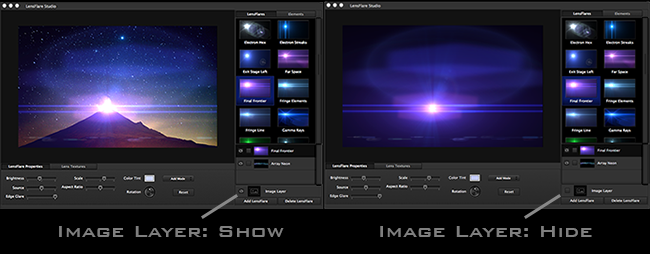
Image Layer
The image layer represents your photo and allows you to set visibility with the Show/Hide checkbox.
If you are planning to composite your final image later in another app such as PhotoShop, you can hide your photo, then select Edit->Copy Image to Clipboard, which copies just the visible layers. Then you can paste this image of the LensFlares and LensTextures into Photoshop to add to your photo.
LensTextures
LensFlare Studio includes a wide selection of actual high resolution lens surfaces and textures. These can add another layer of optical realism to your photo. LensTextures range from dusty glass to scratches and rain drops. These work best when used subtly, giving a hint of a glass lens that you're looking through.
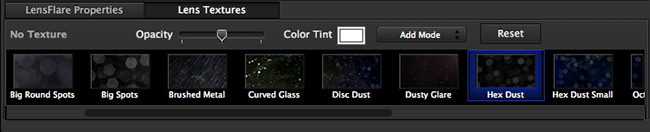
LensTexture Properties
Opacity
This sets the texture level. Use this combined with blend mode to adjust how much of the texture is visible.
Color Tint
This sets color tint of texture. Tint the texture a bit towards your image color for better blending. Tint to an opposite color to make a texture really stand out.
Blend Mode
This sets texture blend mode. Add Mode will additively layer the texture on top of your photo, which tends to be brighter.
Dodge Mode makes the texture less prominent, and more visible only in bright areas of your image. On a dark photo, a texture with Dodge Mode will mostly show just around the LensFlare, while leaving dark areas of the photo dark. Add Mode is the same as "Linear Dodge (Add)" in Photoshop while Dodge mode is modeled on "Color Dodge" blend mode.
Here's an extreme example with the Raindrops texture, just to demonstrate the blend modes.
Reset
Pressing this will set all of the LensTexture properties to their initial values.
Save/Load LensFlare Documents
LensFlare Studio can load and save your LensFlare creations in a LensFlare Document format (.lfd extension). This will preserve all of your layers and effect properties.
Open
Use File->Open (Command-O) to open LensFlare Documents or images. Opening an image will create a new LensFlare Document.
Save
File->Save (Command-S) creates or updates a LensFlare Document.
Import Image
This will load an image into your current LensFlare Document, while preserving all of the current LensFlare layers and settings. Note: Dragging an image file (such as .png or .jpg) onto the main image area will import the image.
Export Image
This will save your image and all LensFlare layers into a rendered image file to save to your system. The rendered image file will be exactly what you see in the app. If you want to save just the LensFlare layers, simply set the image layer as not visible. This is useful if you plan to export the LensFlare layer and add it to your image in another app such as PhotoShop.
Also, Edit->Copy Image To Clipboard (Command-C) performs a similar operation of rendering an image to the clipboard.
LensFlare Documents as Presets
Saving LensFlare Documents is a great way to save your favorite LensFlare designs. If you've created a totally mind-blowing and awesome LensFlare with multiple layers of elements, simply save your document with a name reflecting your new design. Later you can open this document, restoring your custom LensFlare layers, then simply import any photo to use with this LensFlare design.
All About LensFlares
While once in the realm of annoying artifacts that photographers would work to avoid, LensFlares have come into their own as a very unique and powerful aspect of visual language. Essentially, a LensFlare is the interplay of light glaring and reflecting off the pieces of glass in a camera lens. Adding LensFlares gives a photo a sense of depth.
When used subtly, they can impart a certain orgranic quality to sterile photos. Boosting sun glare can add energy and dynamics to an outdoor shot. They are also great for adding the effects of expensive cinematic lenses to photos taken with portable cameras and mobile phones. Turn a basic iPhone photo into stunning masterpiece that looks like it's from the set of a million dollar Hollywood production.
Lens Types
Anamorphic Lens
Anamorphic lens were developed for capturing widescreen images onto standard film. The outer most lens element is cylindrical which squeezes a wide field of view into a standard frame size. Some of the interesting artifacts of this lens shape are the characteristic horizontal streaks and glare lines. These are often used for dramatic and artistic effect in movies.
LensFlare Studio includes quite a few exmaples of anamorphic LensFlares.
LensFlares are often tinted certain colors such blue, red, or even purple. This coloration is often the result of a anti-reflective coatings on lens. Filters can also contribute to coloration, as well as colored source lighting.
Chromatic aboration can occur towards the edge of the lenses as light begins to separate into it's components as if it's going through a prism. This manifests itself with a subtle tinge of color on the edge of elements.

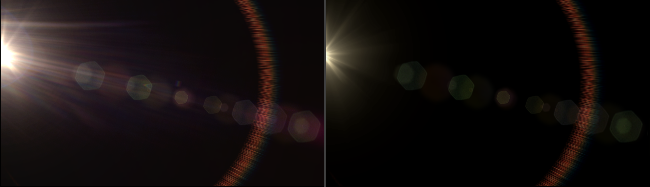
Standard Lens
Standard lenses are spherical in nature and tend to flare symmetrically around the center point. LensFlare Studio offers quite a few examples of these.
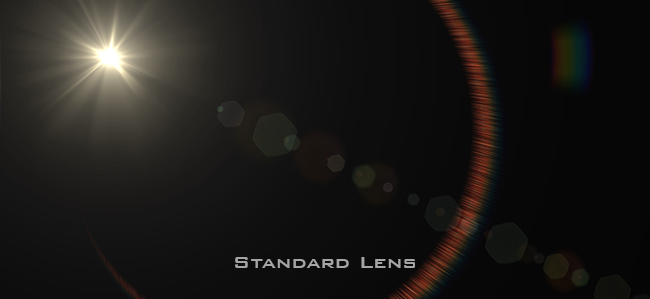
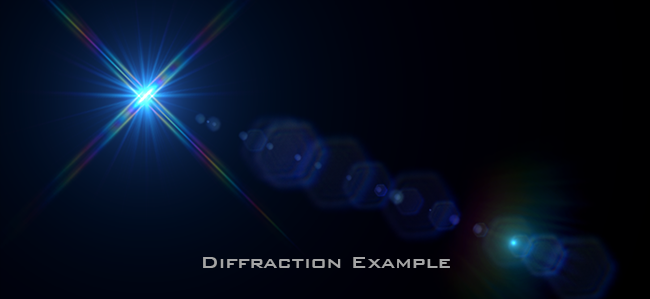
Rainbow-like patterns are specific to digital cameras. These artifacts are formed by internal diffraction on the image sensor itself, which acts like a diffraction grating.
Detailed LensFlare Example
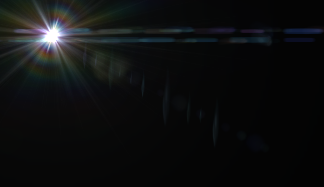
Fringe Elements models a bright xenon arc lamp shining into an anamorphic lens.
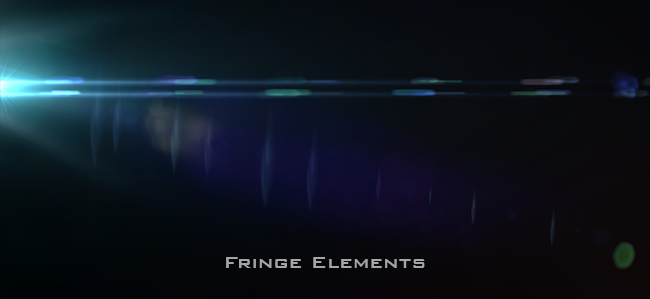
Lens Type
This is an anamorphic lens with the curved cylindrical surface causing horizontal streaks. The blue tint comes from the anti-reflective coating.
This is just an example of the level of detail that goes into modeling each LensFlare, from the light source to the type and shape of the lens.